
Use these steps to work with NozomuNoto PDF planners, notebooks, stickers, covers, and template pages in Penly. The official links below are for downloads, updates, and current help pages.
Reference links
Use these for current app or device help, downloads, updates, vendor support, and manual references.
Install and use stickers in Penly
- Extract the NozomuNoto sticker ZIP first so the individual PNG files are visible.
- Open the planner page where you want to place the sticker.
- Tap the image tool on the Penly toolbar.
Full Penly toolbar screenFull screen view first, then use the cropped highlight below to see the exact area. 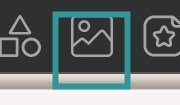
Image toolTap the image tool before choosing a PNG sticker or image. - Use the Photos or Collections panel to choose the PNG image or saved sticker collection.
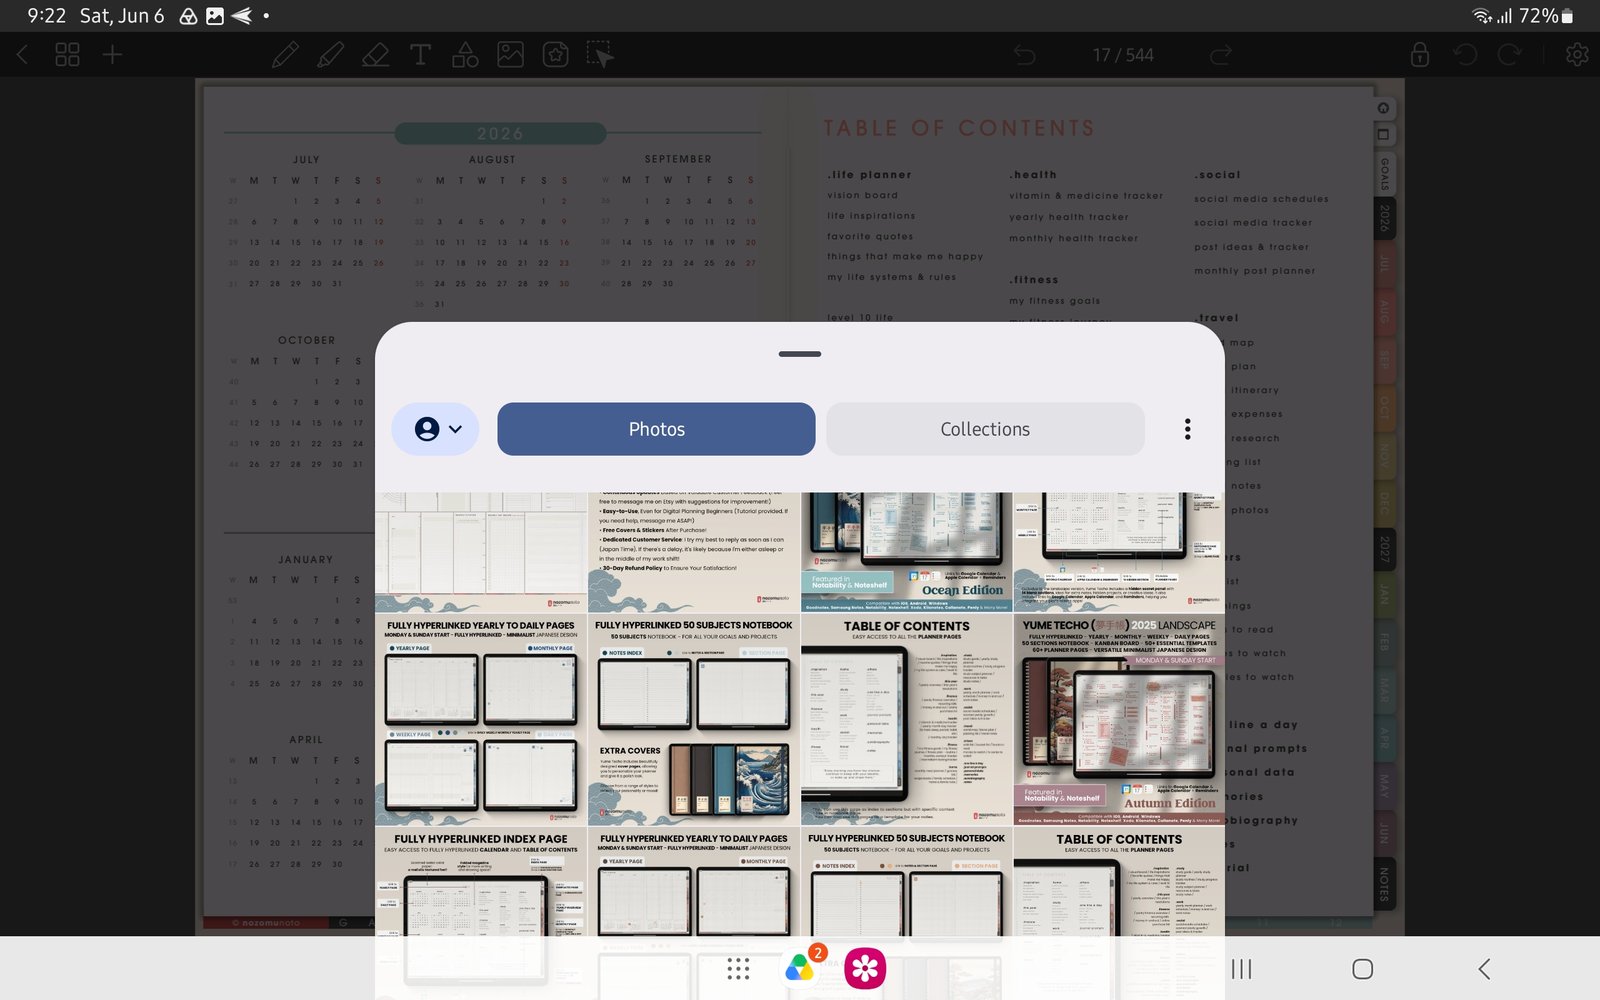
Full image import screenFull screen view first, then use the cropped highlight below to see the exact area. 
Photos and CollectionsUse Photos or Collections to choose the PNG image or saved sticker collection. - Place one sticker first, resize it from the corner, then close and reopen the planner to confirm it stays on the page.
Notes
- Sticker setup tip: Use one test sticker before importing a large folder. Once the first sticker behaves well, organize the rest into clear folders or collections so weekly decorating stays quick.
- If stickers look blurry, reinsert the original PNG and keep it close to its original size.