
Reference links
Use these for current app or device help, downloads, updates, vendor support, and manual references.
Set up a NozomuNoto planner on Boox
- Keep the original NozomuNoto PDF outside Boox as your clean backup.
BOOX stylus device contextUse BOOX for focused reading, writing, and review after the PDF opens correctly in NeoReader. - Transfer one working copy to the Boox device with BooxDrop, USB, cloud storage, or the transfer workflow your model supports.
- Open the PDF in NeoReader and check the cover, Index, one monthly page, and one weekly or notes page.
- Tap the center area to show NeoReader tools, then find Contents, bookmark, page jump, and pen or annotation tools.
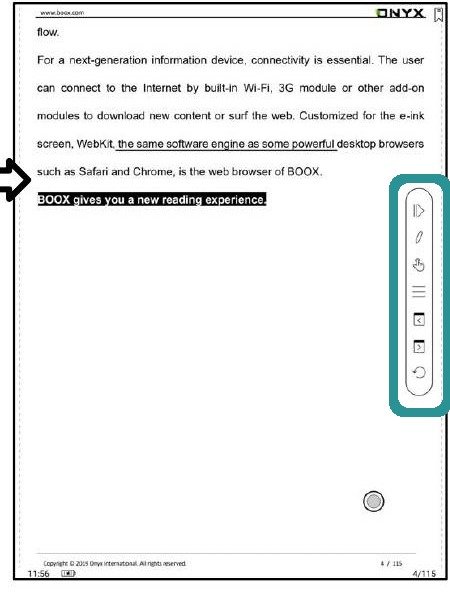
BOOX floating toolbarBOOX manual UI showing reader tools. Check your model toolbar before relying on daily planning. - Bookmark the Index, current month, current week, and one notes page if you use them often.
- Write one tiny test mark, close the file, reopen it, and confirm the writing stayed.
- Use the current month or week first. Add more bookmarks or page experiments only after the basic flow feels reliable.
Notes
- Good first Boox setup: Start with one clean PDF, one Index route, a few bookmarks, and one writing test. Boox can be lovely for calm planner review when the return path is simple.
- If the full planner feels too big, use only Index, current month, current week, and one notes or template page for the first week.