
Browse tips
Yume Techo Use Cases
- As a Student
- As a Teacher
- For Moms & Family
- For Work
- For Creative Projects
- For Bible Study
- For Small Business
- For Content Creation
- For Fitness & Health
- For Travel
- For Rapid Logging
- For Life Planning
- For Journaling & Reflection
- For Budget & Finance
- For Meals & Grocery
- For Project Planning
- For Home Management
- For Creative Writing
- For Music Writing
- For Brainstorming
- For Homeschooling
Page-by-Page Use Ideas
Essential Template Pages
- Template Index
- Yearly Spread
- Yearly Grid
- Yearly - Day Month Tracker
- Monthly - Day Tracker
- Monthly Grid
- Monthly Overview
- Weekly Review
- Monthly Spread
- Weekly - Horizontal
- Weekly - Vertical
- Routines
- 30 Day Challenges
- 100 Day Challenges
- Vision Board
- 100 Things
- Multi Purpose Table
- Level 10 Life
- 31 Things
- Daily Page - Type 1
- Daily Page - Type 2
- Gantt Chart - Universal
- Gantt Chart - Weekly
- Photo Page
- World Map
- Multi Purpose Wheel
- Kanban - 4/6/8 columns
- Template Pages
- Level 10
- Daily Template
- Yearly Tracker
Life Planner Pages
- Life Planner Index
- Life Planner
- Vision Board
- Life Inspirations
- Favorite Quotes
- Things That Make Me Happy
- My Life Systems and Rules
- Level 10 Life
- Things I Need To Change
- Bucket List
- Skills To Learn
- Projects To Make
- Challenges To Try
- Resolutions
- Yearly Goal Overview
- Goal Planner
- Reward Ideas
- Distraction List
- My Achievements
- Note To My Future Self
- Routines
- 30 Day Challenges
- Kanban Board
Books
How to use Yume Techo as a digital travel planner
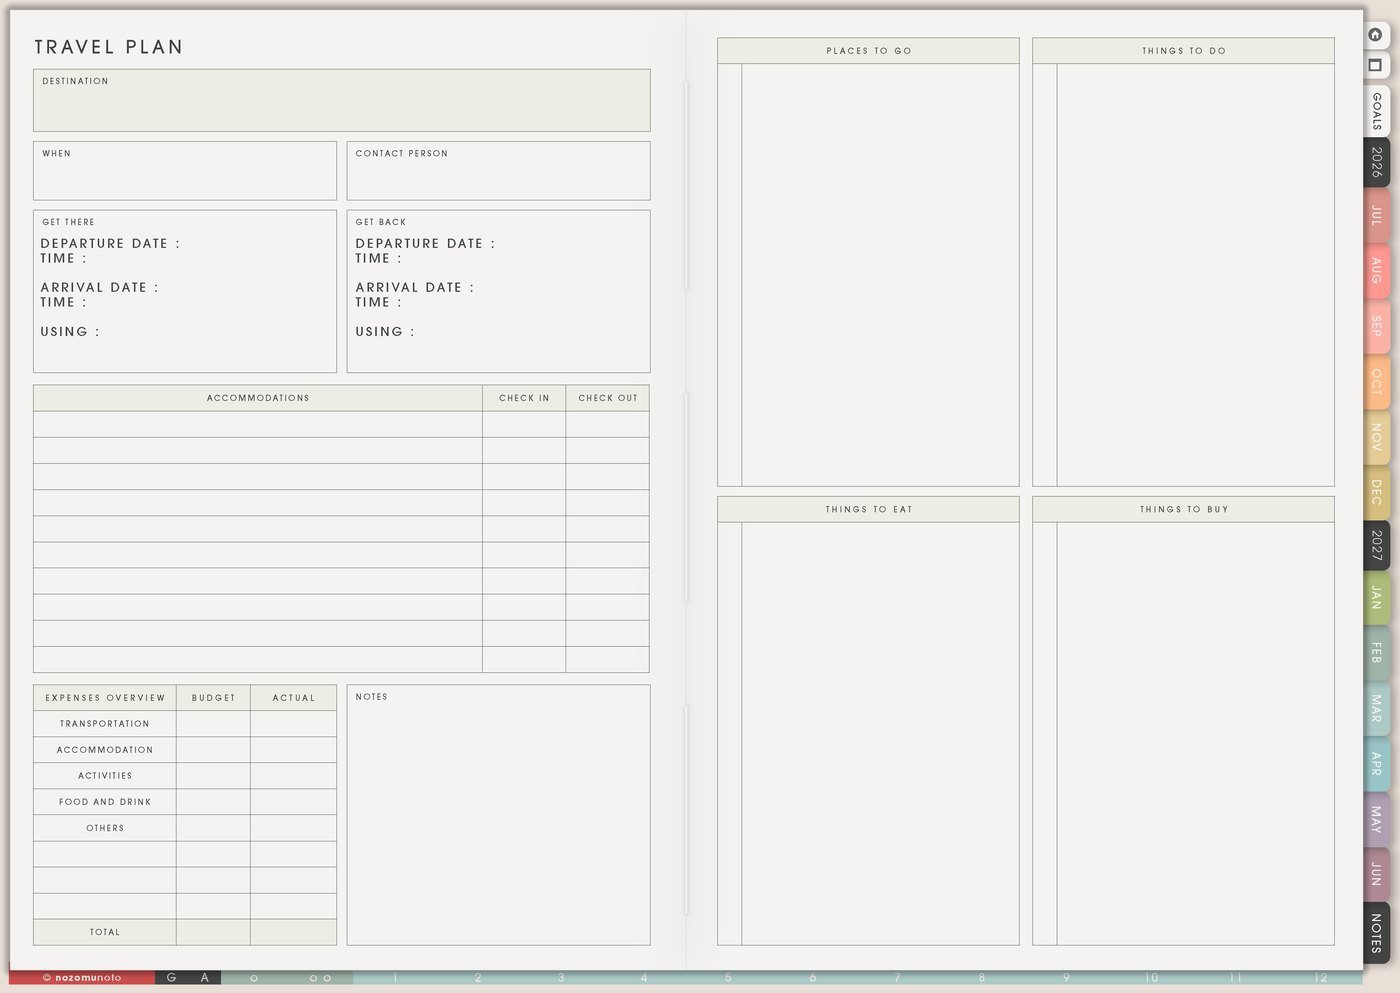
Use Yume Techo as a digital travel planner for itineraries, packing lists, bookings, daily plans, trip notes, and travel memories.
I use this Yume Techo travel setup for destination ideas, research, booking decisions, itinerary days, packing, expenses, documents, backup plans, and trip memories.
For me, travel planning needs two separate spaces: the dream space and the real decision space. I want room to save cafes, museums, bookstores, train ideas, family needs, and photo spots, but I also need one page that tells me what is actually booked, packed, paid, and happening next.
A simple travel planner setup
Use Yume Techo to keep your itinerary, packing list, bookings, and trip notes together.
- Use the monthly pages for travel dates, booking deadlines, passport reminders, and trip countdowns.
- Use the weekly pages for pre-trip tasks, packing, shopping, reservations, and travel prep.
- Use the daily pages for each day’s itinerary, addresses, tickets, meal plans, and notes.
- Use notebook sections for packing lists, hotel notes, transport details, budget notes, and places to visit.
- Use template pages for itinerary plans, packing checklists, travel documents, memory keeping, and post-trip notes.
- Use the Index page to jump quickly between itinerary, packing, and travel notes.
Start with your travel dates and packing list first. Then add each day’s plan as the trip gets closer.
For related workflows, see the digital budget planner for bills and subscriptions, the digital journal planner for prompts and weekly reflection, and the digital family planner for schedules, meals, and mental load.
Use case ideas for a travel planner
1. Use Travel Planner for the trip dashboard
Use Travel Planner for the trip basics: destination, dates, people, budget, stay, transport, booking links, important documents, weather notes, emergency details, must-do items, and anything you need to open quickly.
This page is the dashboard. If someone asks where we are staying, what time the train leaves, where the booking is saved, or what needs to be packed tomorrow, this is the page I want to find fast.
Start simple: destination, dates, budget, stay, transport, top three priorities, and one note about what makes the trip feel successful.
Related Tips: Travel Planner page ideas has more ways to set up the trip dashboard before details spread everywhere.
2. Use Travel Research before you decide
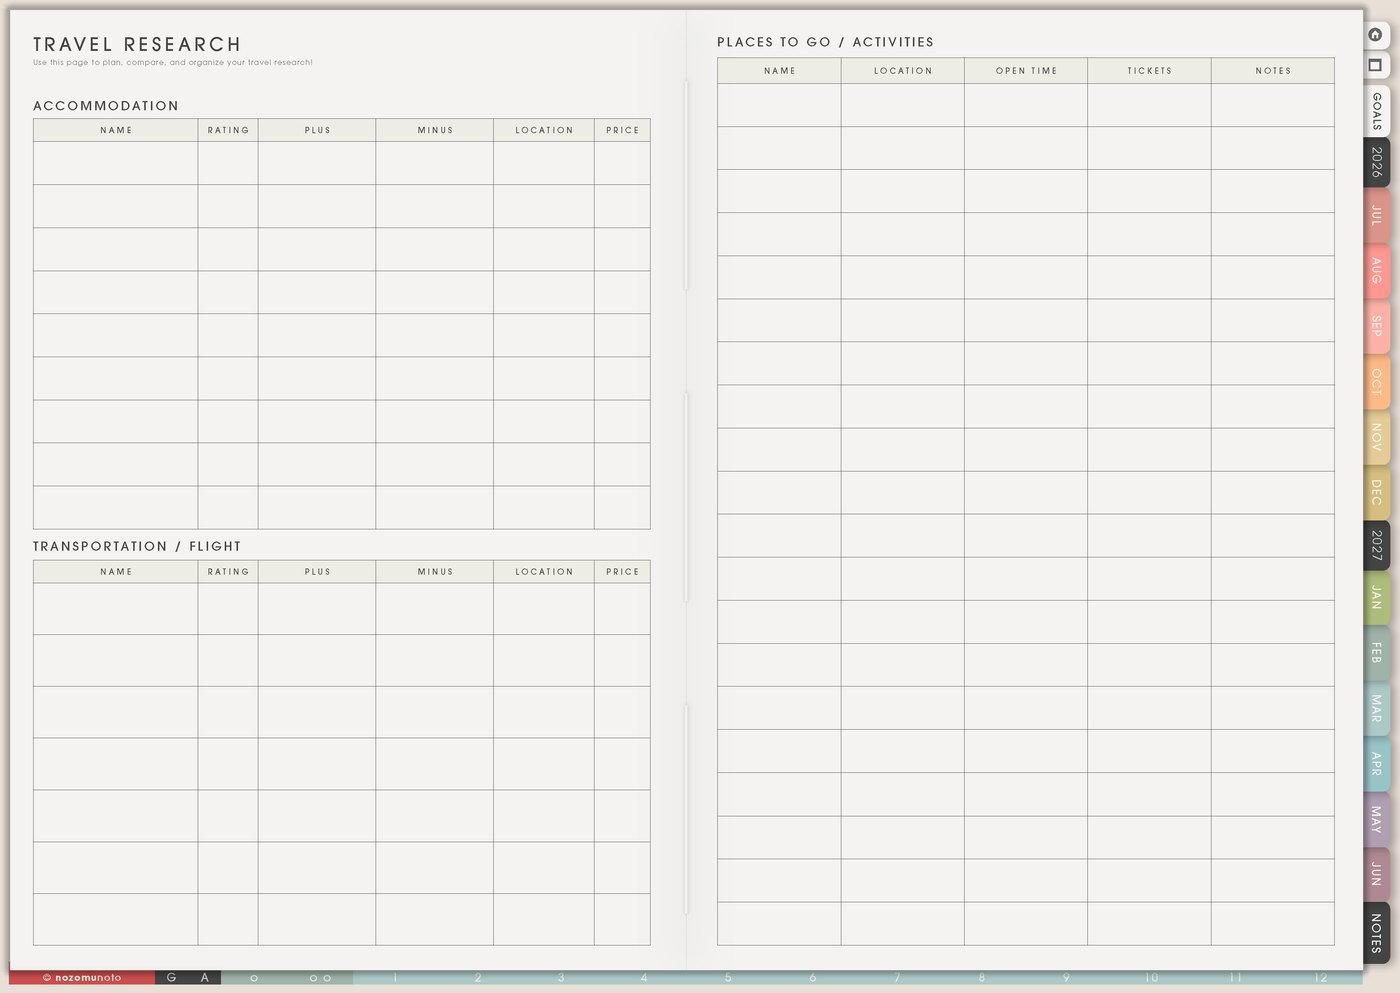
Use Travel Research for options: places, food, transport, opening hours, prices, maps, accessibility notes, booking links, neighborhood ideas, rainy-day options, and things to skip.
I keep research separate from Travel Itinerary so options stay separate from commitments. Research can be messy. The itinerary is where I choose what the day can actually hold.
Useful columns can be place, why it interests me, cost, travel time, open hours, must-book, and chosen or maybe.
Related Tips: Travel Research page ideas gives more examples for collecting places, links, costs, and maybe options before choosing the real plan.
3. Use Travel Itinerary for the actual days
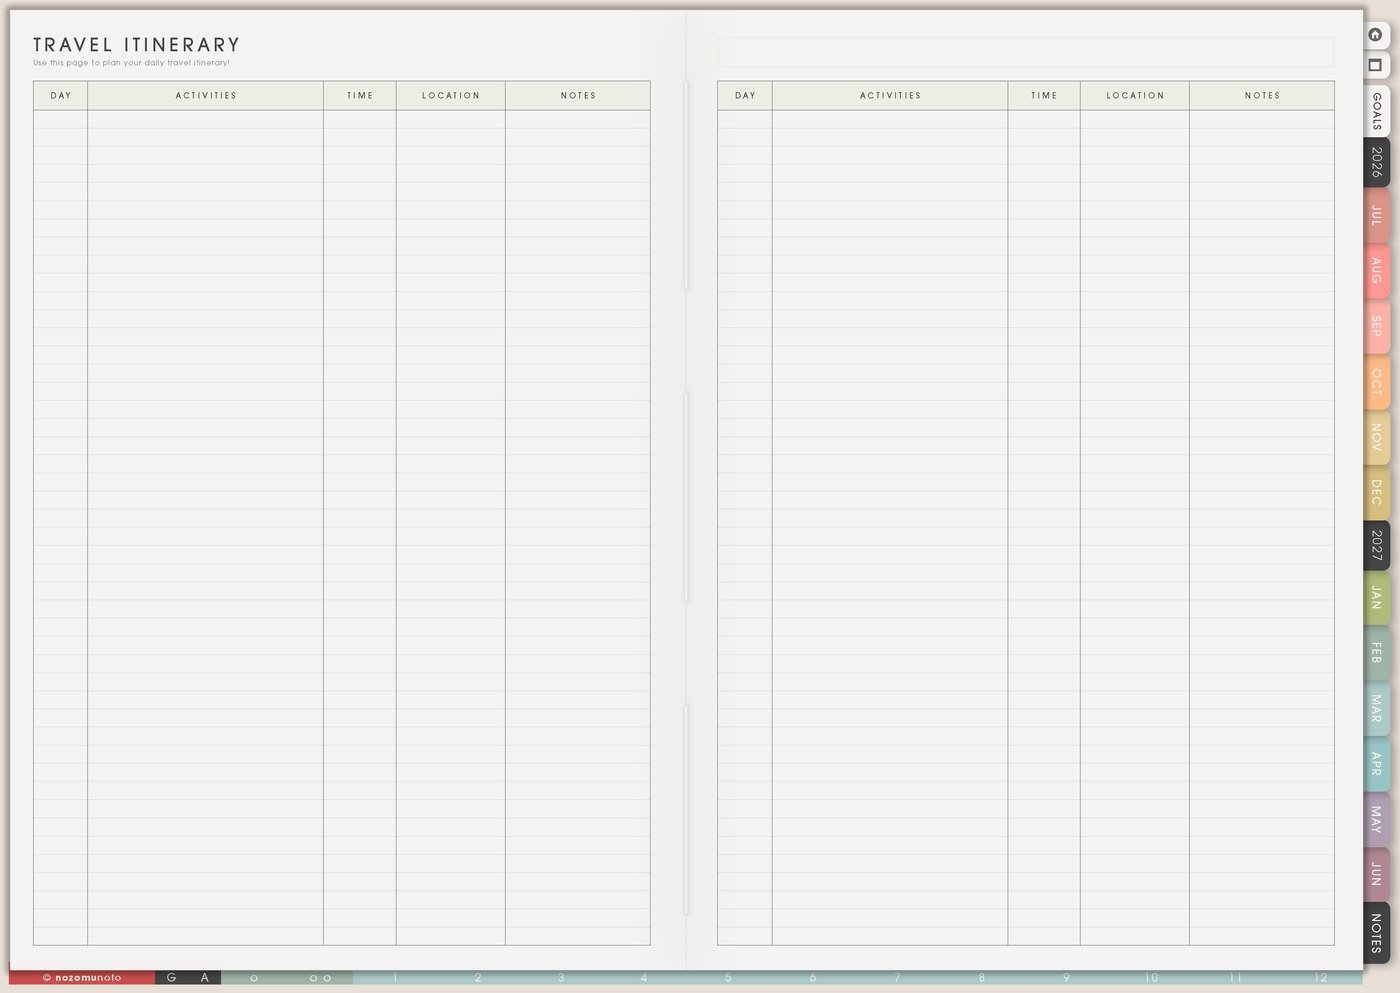
Use Travel Itinerary for anchor activities, travel time, meals, rest, reservations, area reminders, tickets, backup options, and blank space. Leave room for slow mornings, weather changes, getting tired, and wandering into something better than the plan.
A trip can be planned without being overpacked. If every hour has an activity, add food, bathroom breaks, walking time, waiting time, and recovery before adding another stop.
A realistic day can have one must-do, one nice-to-do, one meal plan, one backup, and one open space. That is often enough, especially when traveling with family.
Related Tips: Travel Itinerary page ideas has more examples for turning research into actual days with food, rest, and backup room.
4. Use Packing List by category
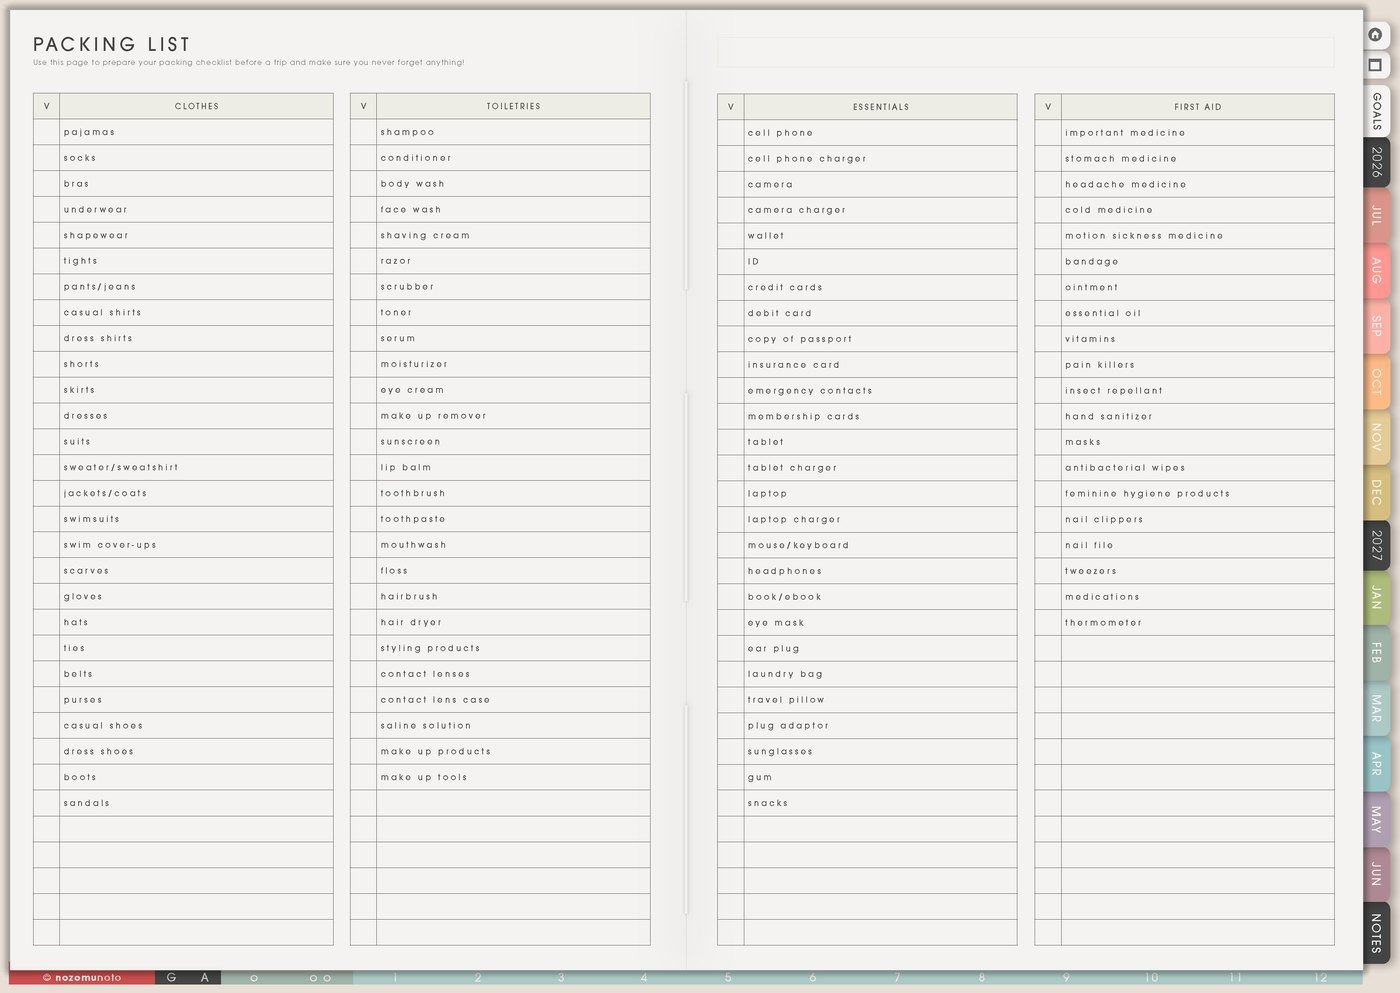
Use Packing List by category: documents, tech, clothes, toiletries, medicine, planner, snacks, gifts, weather items, child or family items, and return-home items. Add a last-minute section for charger, wallet, keys, passport, glasses, medicine, and anything that cannot be packed early.
For longer trips, add buy before leaving and pack on morning of trip sections. This prevents packing from becoming panic time.
If I travel with family, I add one line per person for the items only that person needs: favorite small item, school document, medication, charger, swimsuit, or special shoes.
Related Tips: Packing List page ideas has more ways to group early-pack, last-minute, family, medicine, and return-home items.
5. Use Travel Expenses during and after the trip
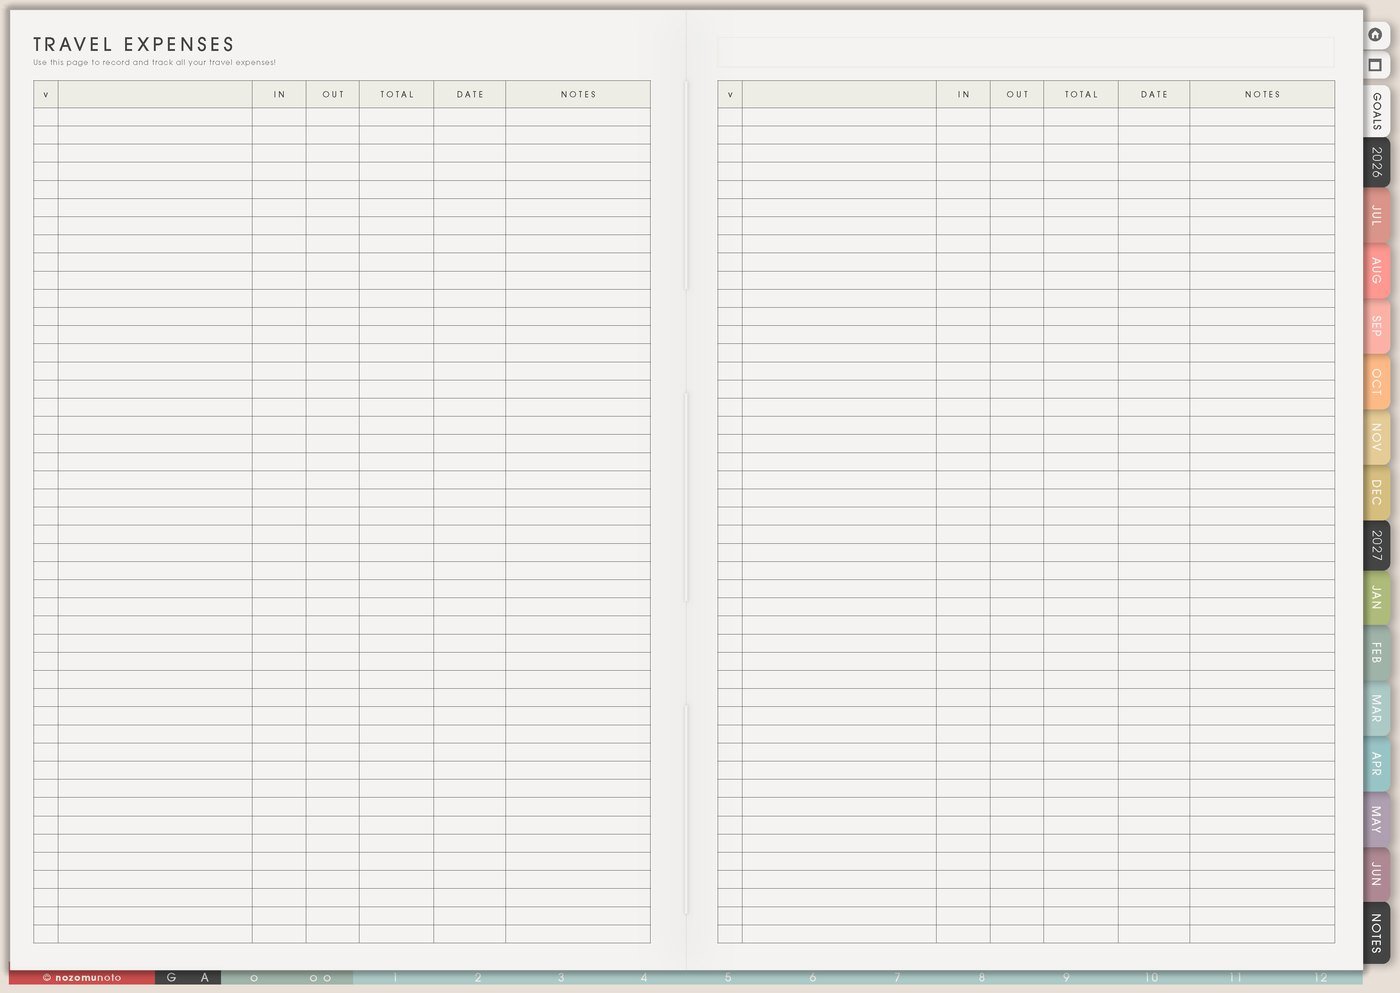
Use Travel Expenses for planned cost, actual cost, deposits, tickets, transport, food, souvenirs, shared payments, cash, refunds, and receipts you need to save. Keep it light enough to update while traveling.
Living in Japan makes travel costs feel very real, so I like writing what was worth it, what surprised me, and what I want to budget differently next time.
For shared trips, track who paid, amount, what it was for, payment method, and whether it is settled.
6. Use Resources / Tasks for documents and links
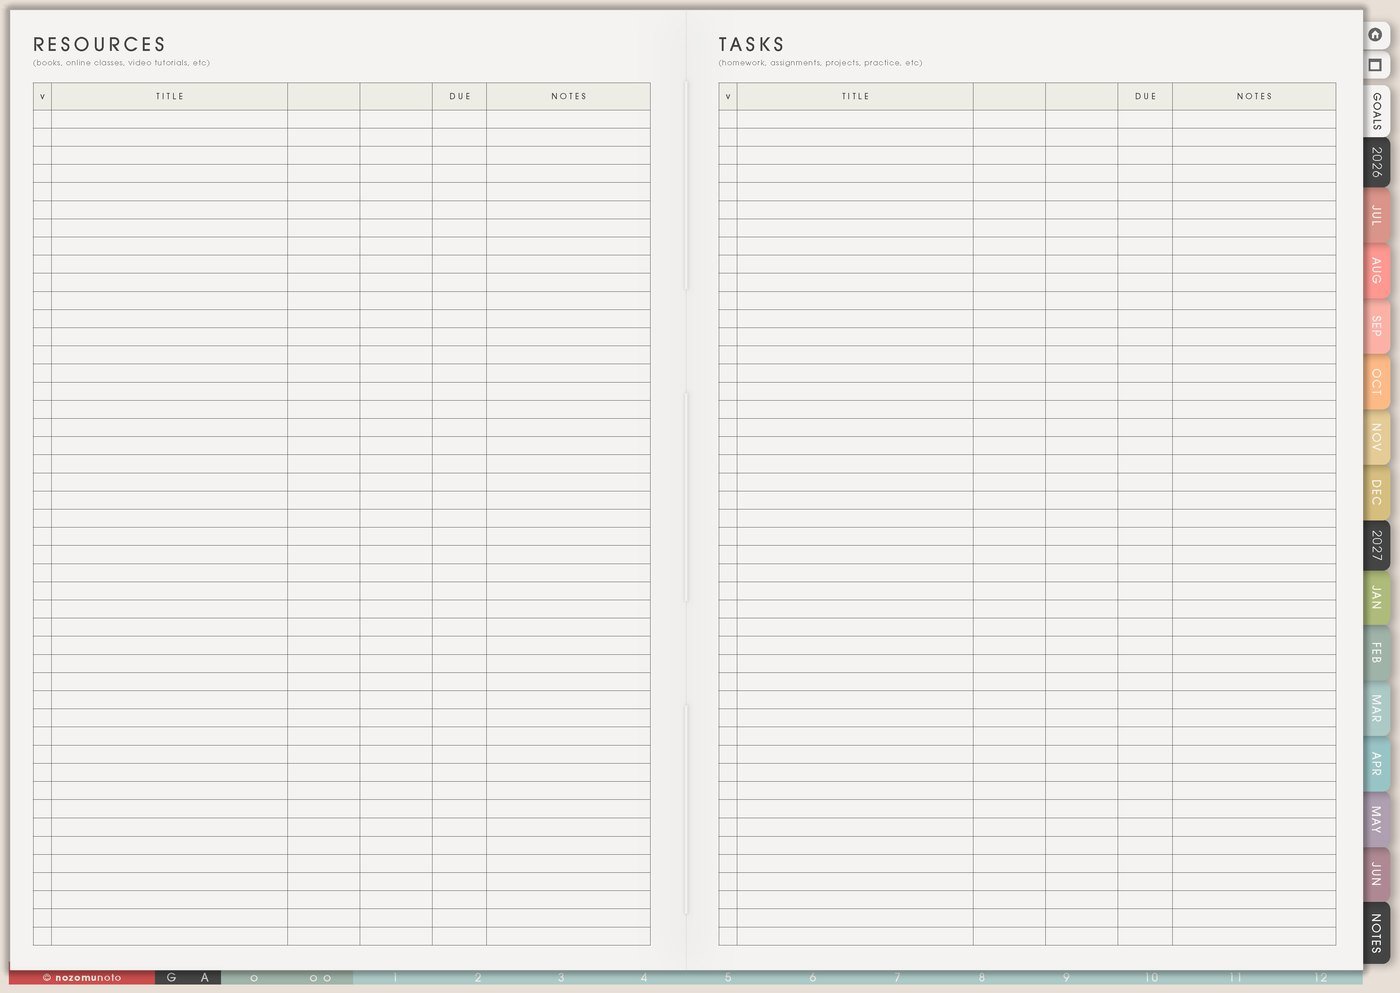
Use Resources / Tasks for booking links, booking reminders, map links, ticket screenshots, secure document reminders, hotel policies, insurance reminders, transport apps, emergency-contact reminders, and things to print or download before leaving.
This page keeps documents and links out of the itinerary. Travel Itinerary should show what happens when. Resources / Tasks can hold the details I need to access quickly.
Before the trip, move only the active tasks to Weekly: download map, print ticket, check passport, save hotel-area note, or pack charger.
For privacy, I keep passports, full booking numbers, addresses, emergency contacts, insurance details, and children's details in secure travel apps or documents. In Yume Techo, I write only safe reminders, short labels, and where to find the real document.
7. Use Travel Photos for memories
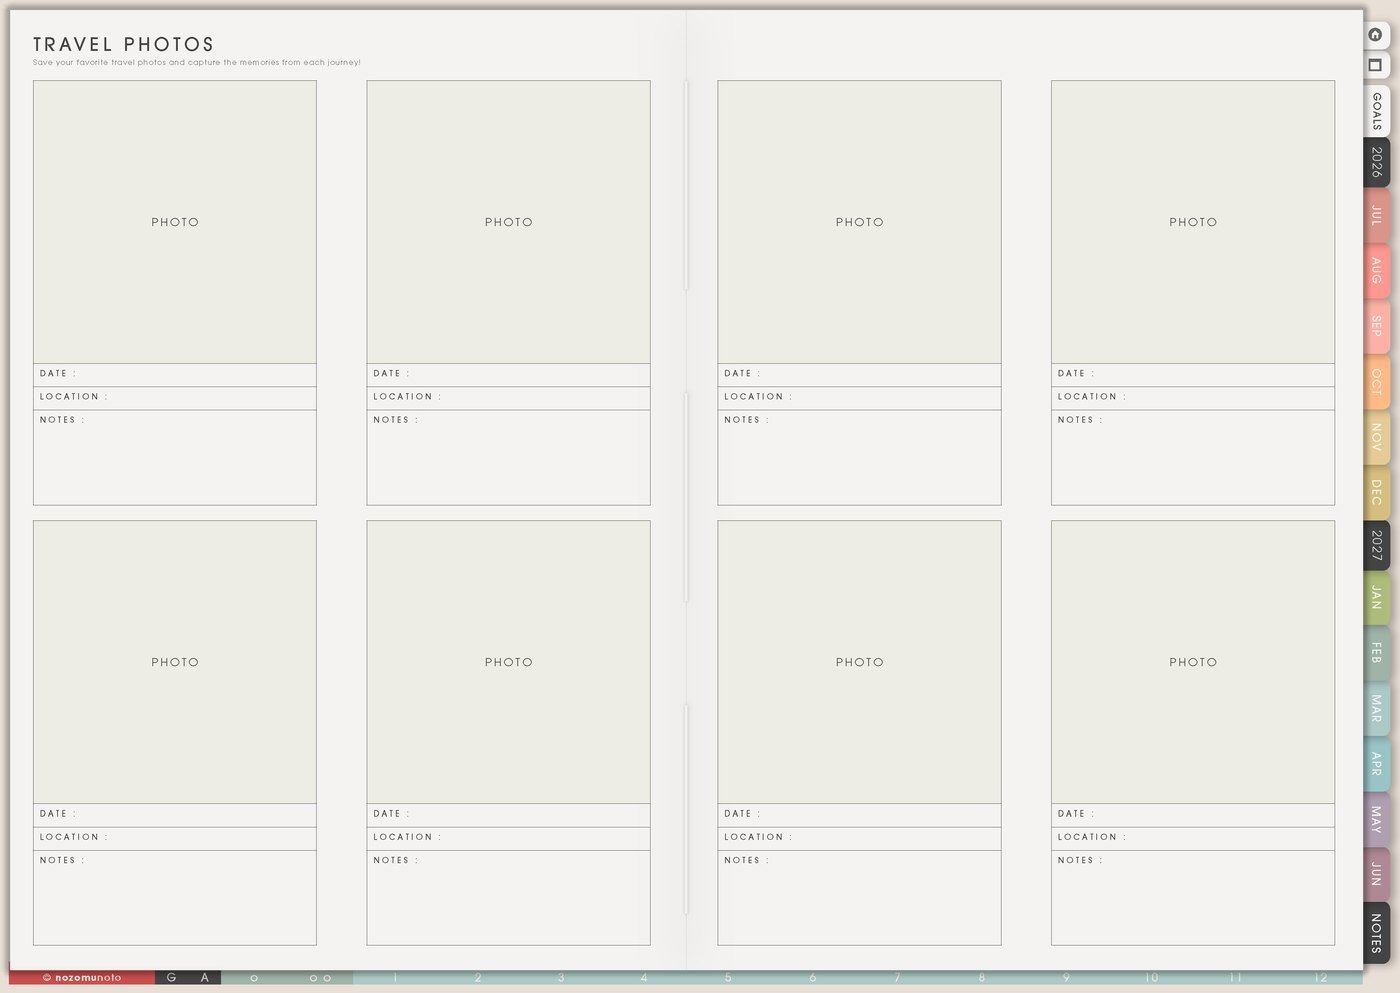
Use Travel Photos for favorite places, meals, funny moments, outfits, tickets, maps, hotel views, tiny details, and the memory you want to keep. Add one short caption: where, when, and why it mattered.
This keeps the planner useful after the trip too. It becomes both preparation and memory keeping.
A memory page does not need every photo. I pick the few photos that tell the trip story: arrival, favorite meal, best view, unexpected moment, and one tiny detail I want to remember later.
Set it up in ten minutes
- Name the trip. Destination, dates, people, and main reason for going.
- Write the dashboard basics. Stay, transport, budget, documents, weather, and top priorities.
- Collect options on Travel Research. Places, food, transport, costs, links, and notes.
- Choose only the anchors. Move chosen items to Travel Itinerary with travel time and rest.
- Start Packing List early. Add last-minute items in their own section.
- Add document tasks to Resources / Tasks. Download, print, screenshot, confirm, or ask.
- After the trip, save the story. Add a few photos, expenses, and what to do differently next time.
What I usually use it for and how I use it
Tips for using this setup
- Separate research from decisions. Save cafes, routes, hotels, and places on Travel Research first. Move only chosen anchors to Travel Itinerary.
- Plan the day around anchors. Choose one must-do, one nice-to-do, one meal plan, one backup, and one open space before adding more.
- Split packing into timing sections. Use early pack, buy before leaving, and morning-of items so chargers, medicine, documents, wallet, and keys stay visible.
- Track shared costs before memory gets messy. Write who paid, amount, what it was for, payment method, and whether it is settled.
- Keep links and screenshots in one shelf. Add booking links, ticket screenshots, hotel-area notes, booking reminders, transport apps, and the task connected to each item.
- Leave recovery space in the itinerary. Add slow starts, food breaks, travel buffers, laundry, and optional blocks. Travel uses more energy than the map shows.
- Choose the memory while it is still fresh. After the trip, pick five photos and write one sentence each: where, when, and why it mattered.
When you need setup help
For the travel workflow, use Travel Planner for the dashboard, Travel Research for options, Travel Itinerary for real decisions, Packing List for categories and last-minute items, Travel Expenses for money notes, Resources / Tasks for booking links, and Travel Photos for memories. If the technical step is unclear, like importing Yume Techo, copying a trip page, adding photos, or using hyperlinks, use the NozomuNoto Help Center for exact app steps.
Final thought
Travel planning works better for me when options and decisions are not mixed together. I hope this setup helps you research freely, choose the real plan, leave space for food and rest, and save the little memories after the trip!
Build this full setup in Yume Techo
Use the pages shown above as a complete workflow, then adjust the setup until it fits your real week.
Browse NozomuNoto products
Find the planner, notebook, e-reader file, or add-on that fits the way you actually plan.
About NozomuNoto
NozomuNoto creates Japanese-inspired digital planners, notebooks, stickers, and e-reader PDFs for people who want useful pages that still work in real life.
Yume Techo is built with dated yearly, monthly, weekly, daily, Life Planner, Planner Pages, and Template Pages so one planner can hold study, work, home, ADHD-friendly routines, lists, and creative projects without adding paper bulk.
New to digital planning? Start there, use the Help Center for setup help, or browse NozomuNoto products when you are ready to choose your planner.