
Browse help topics
Getting Started
Need help choosing?
Need help after purchase?
Download & Import
Using your notebook/planner
- How to change or reuse template pages on planner landing pages
- Why stickers look blurry when enlarged
- What to check if a product does not work on your device
- How to use NozomuNoto index pages
- How to use NozomuNoto template pages
- How to change a digital planner cover
- How to install and use digital stickers
Product Tutorials
- How to use Yume Techo Landscape tutorial pages
- How to use Yume Techo Portrait tutorial pages
- How to use Shibui Techo Weeks tutorial pages
- How to use Shibui Techo Months tutorial pages
- How to use Yume Noto V1 Landscape tutorial pages
- How to use Yume Noto V1 Portrait tutorial pages
- How to use Yume Noto V2 Landscape tutorial pages
- How to use Yume Noto V2 Portrait tutorial pages
- How to use Yume Noto V3 Portrait tutorial pages
- How to use NozomuNoto Ultimate Digital Stickers
- How to use NozomuNoto Digital Covers
- Which NozomuNoto instruction or tutorial file should I open first?
Device & App
iOS / iPadOS
GoodNotes
Notability
Noteshelf
Noteful
StarNote
Flexcil
Kilonotes
Android
StarNote
Samsung Notes
Penly
Flexcil
Noteshelf
Xodo
E-reader Devices
Boox devices
reMarkable
Bigme
Supernote
How to use Yume Noto V1 Portrait tutorial pages
Learn how to start using Yume Noto V1 Portrait tutorial pages, confirm your version, test links, use the Index, and begin with one page.
On this page
- This tutorial is for
- Built-in tutorial pages and visual guide
- Guide Page
- Tips & Tricks Page
- Index Page
- Template Page
- What Yume Noto V1 Portrait is best for
- Version and setup links
- How to use this notebook first
- Good ways to use this notebook
- Helpful expectations before you fill it
- Simple starter setup
- When the Yume Noto V1 Portrait setup gets tricky
- 1. You name too many sections
- 2. A section becomes too full
- 3. The portrait page feels too narrow
- 4. A copied template is hard to find
- Where to go next
This page is for Yume Noto V1 Portrait. Before following the steps, check that your product version and orientation match this tutorial.
This tutorial is for
- Save the original download as your clean backup.
- Import one working copy into your app.
- Open the Index or tutorial page.
- Tap one link to test navigation.
- Choose one notebook page or section to use today.
- Write one real note, list, idea, or plan.
- Learn the next feature only when you need it.
Built-in tutorial pages and visual guide
Use the images below as visual checkpoints. The extra notes explain what to do with the page after you understand what it shows.
Guide Page
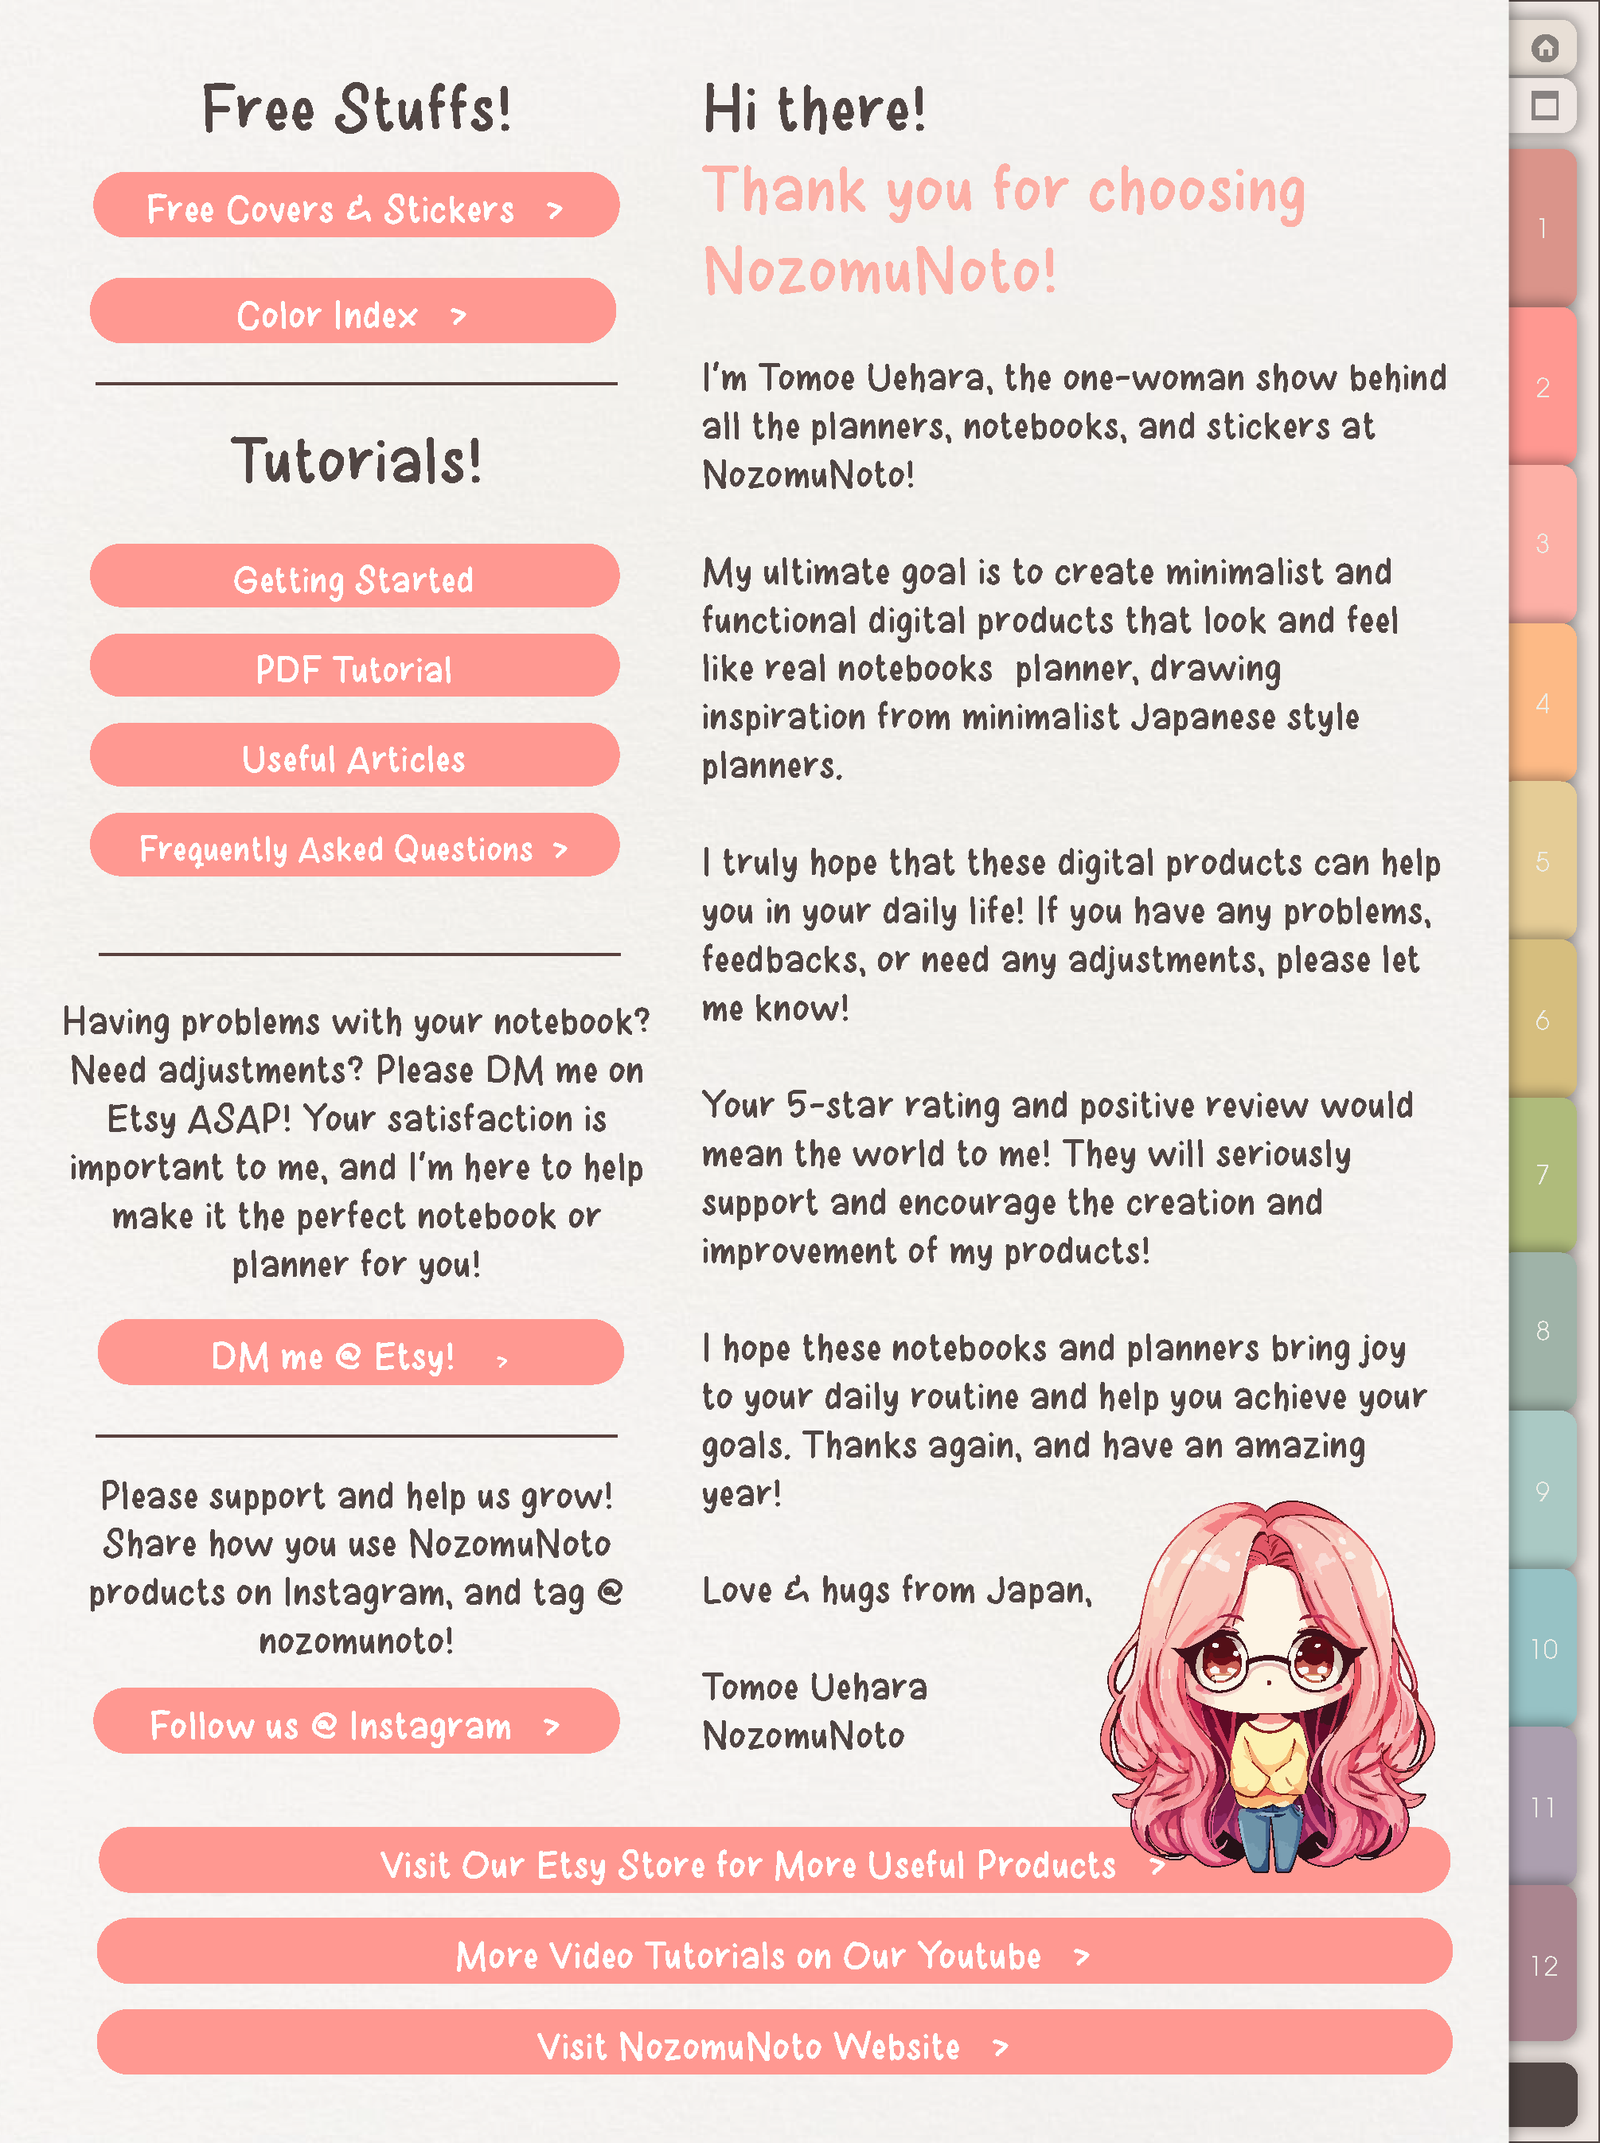
Start with the guide page if you are opening the notebook for the first time. It points to help links, product information, and the general setup path before you begin naming sections or copying templates.
Tips & Tricks Page
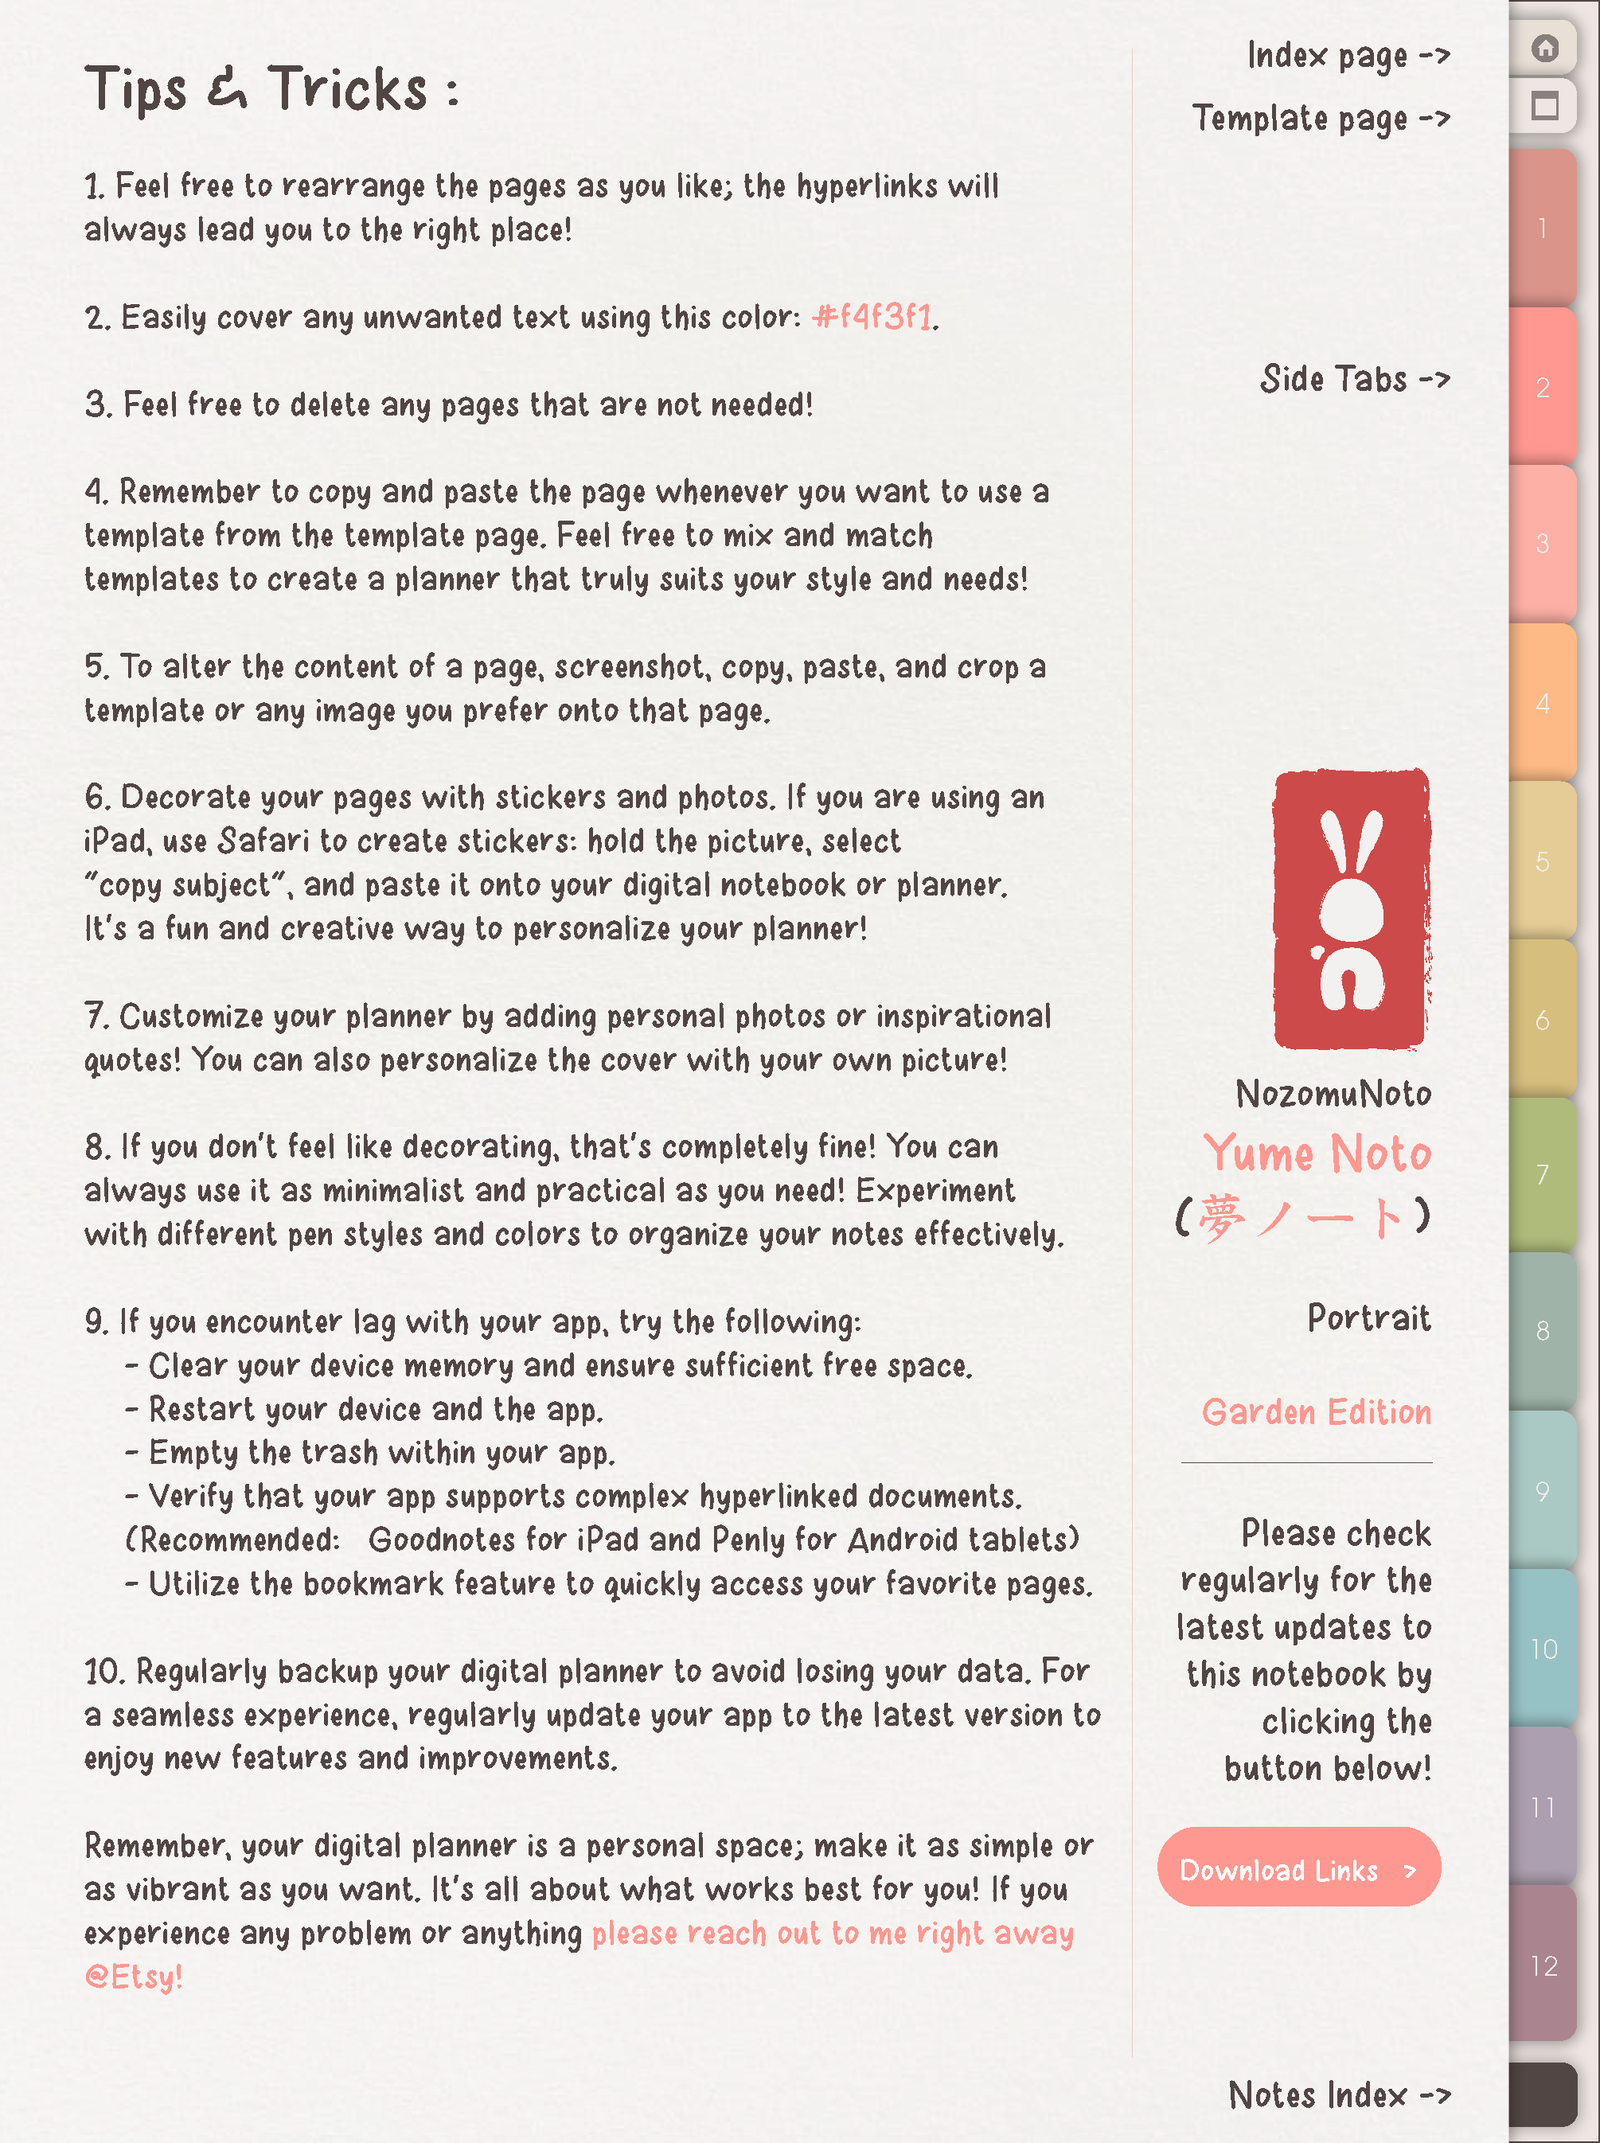
Use Tips & Tricks when you need the quick rules again: how links behave, how tabs work, why copied pages need their own return path, and why it is safer to keep one clean backup before heavy editing.
Index Page
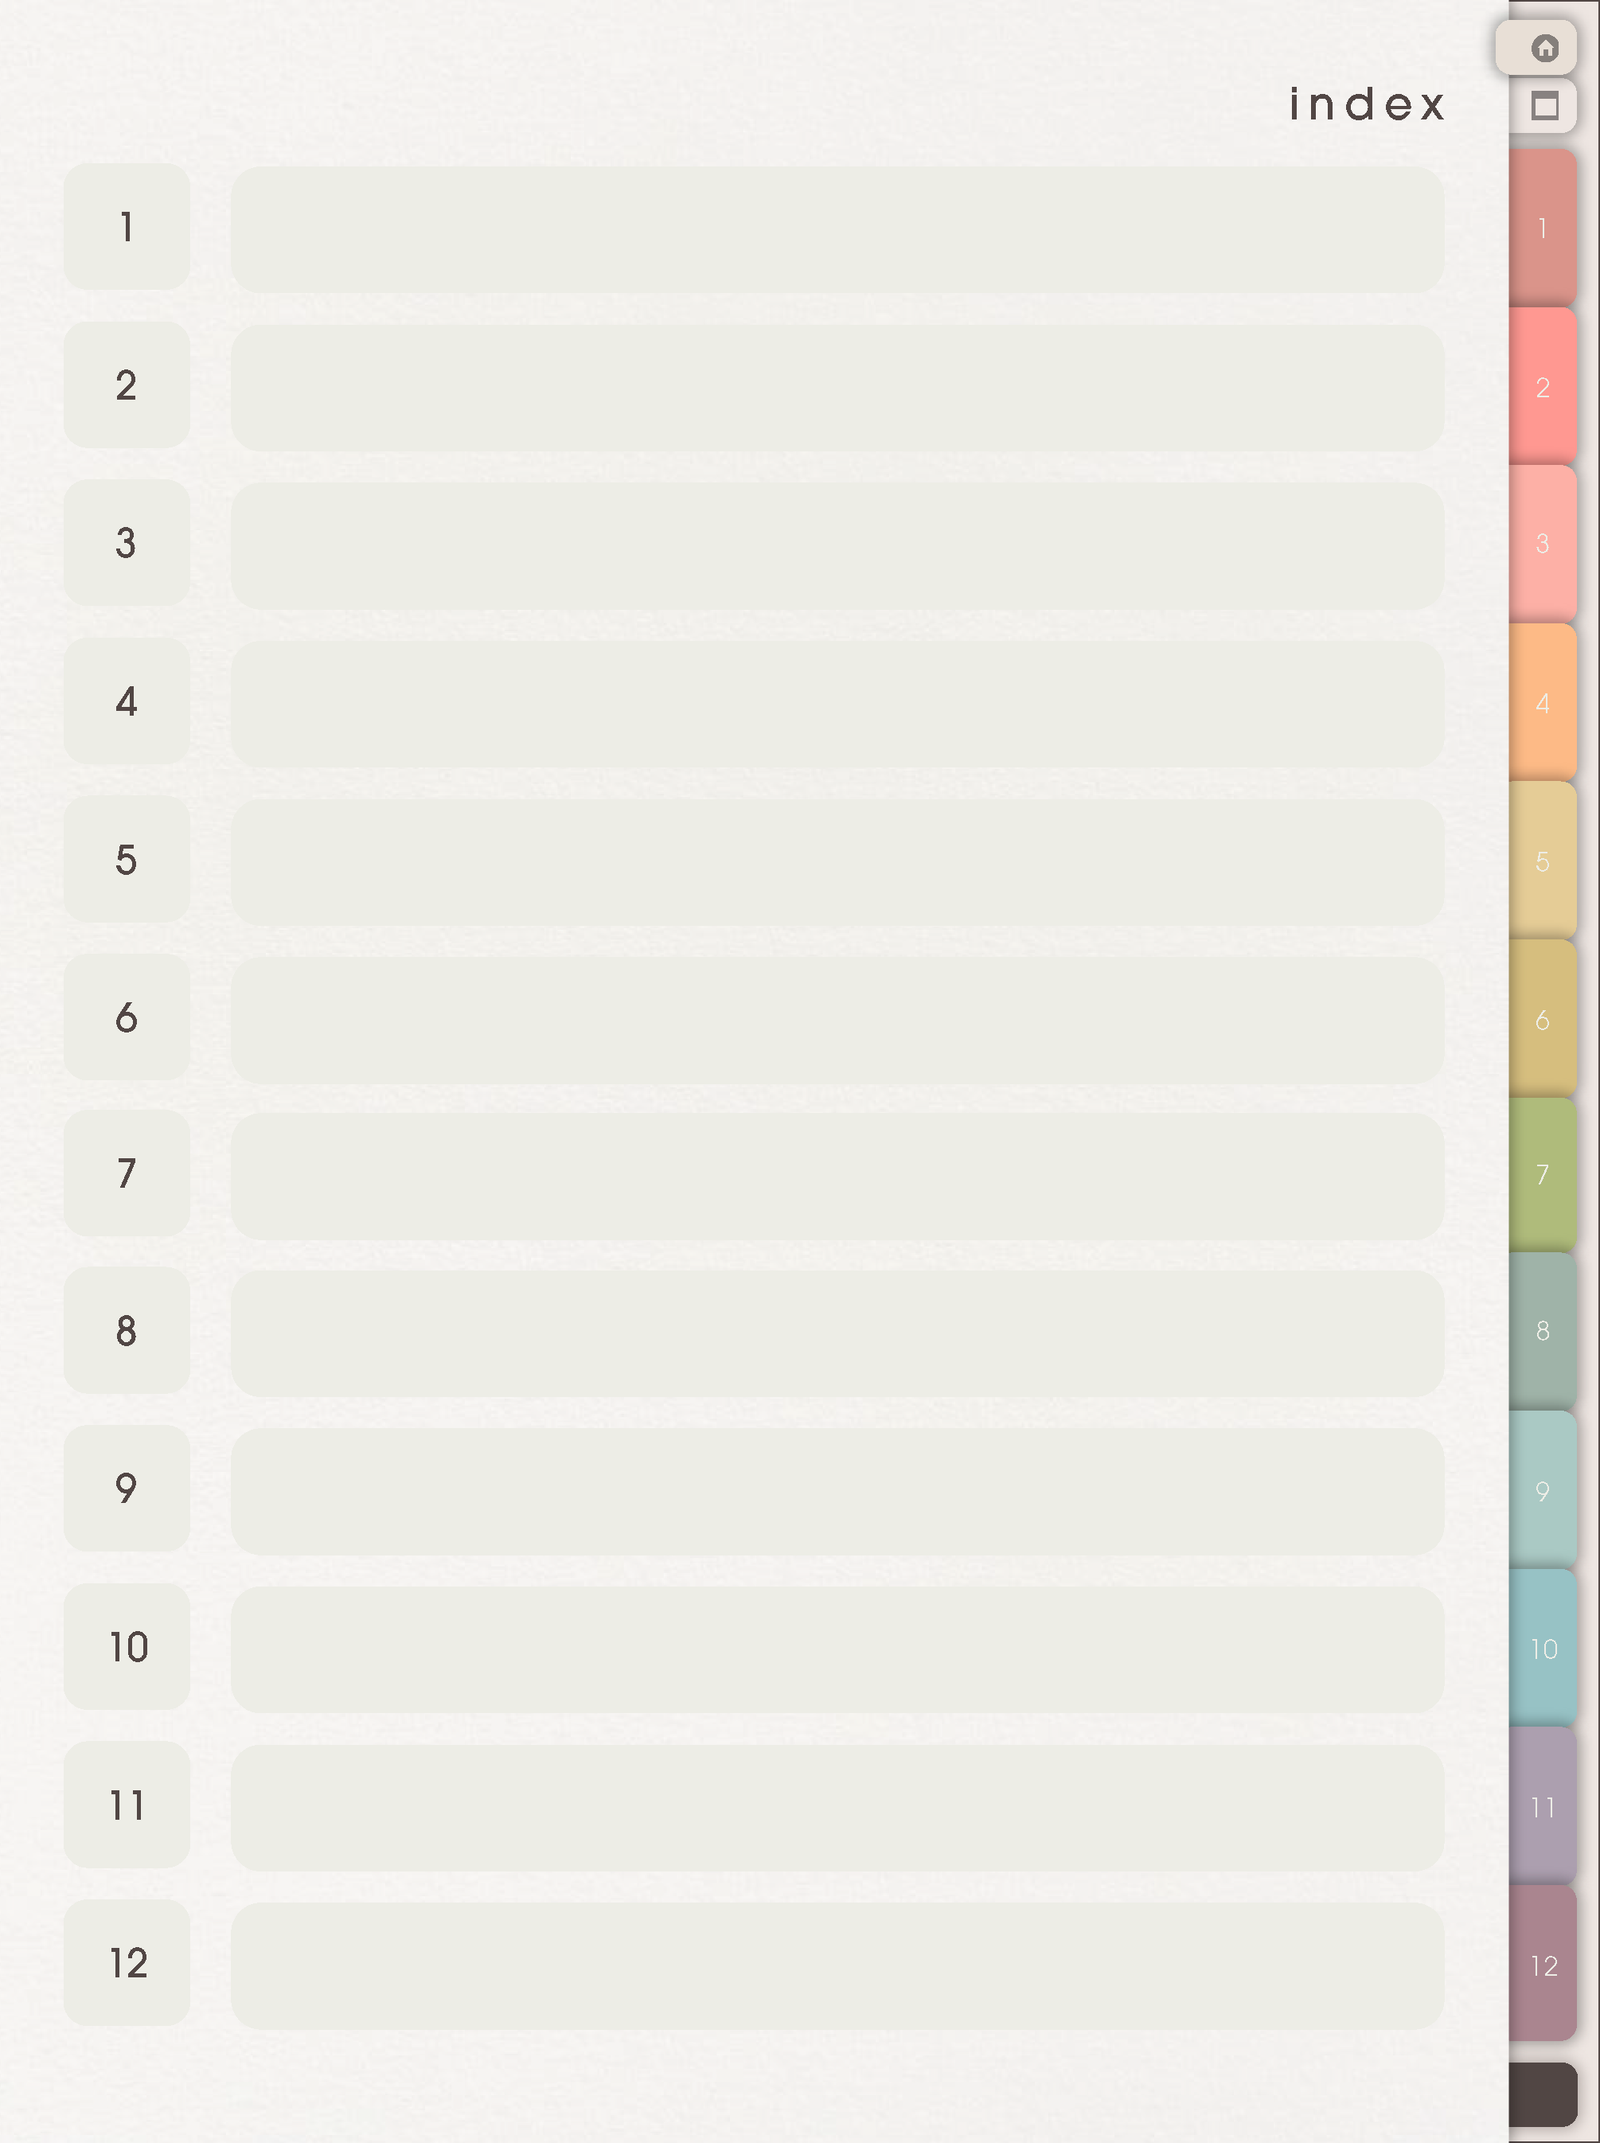
Start with Index so the notebook has a simple map. Name only the sections you need now, then add more later when your notes have a clear pattern.
Template Page
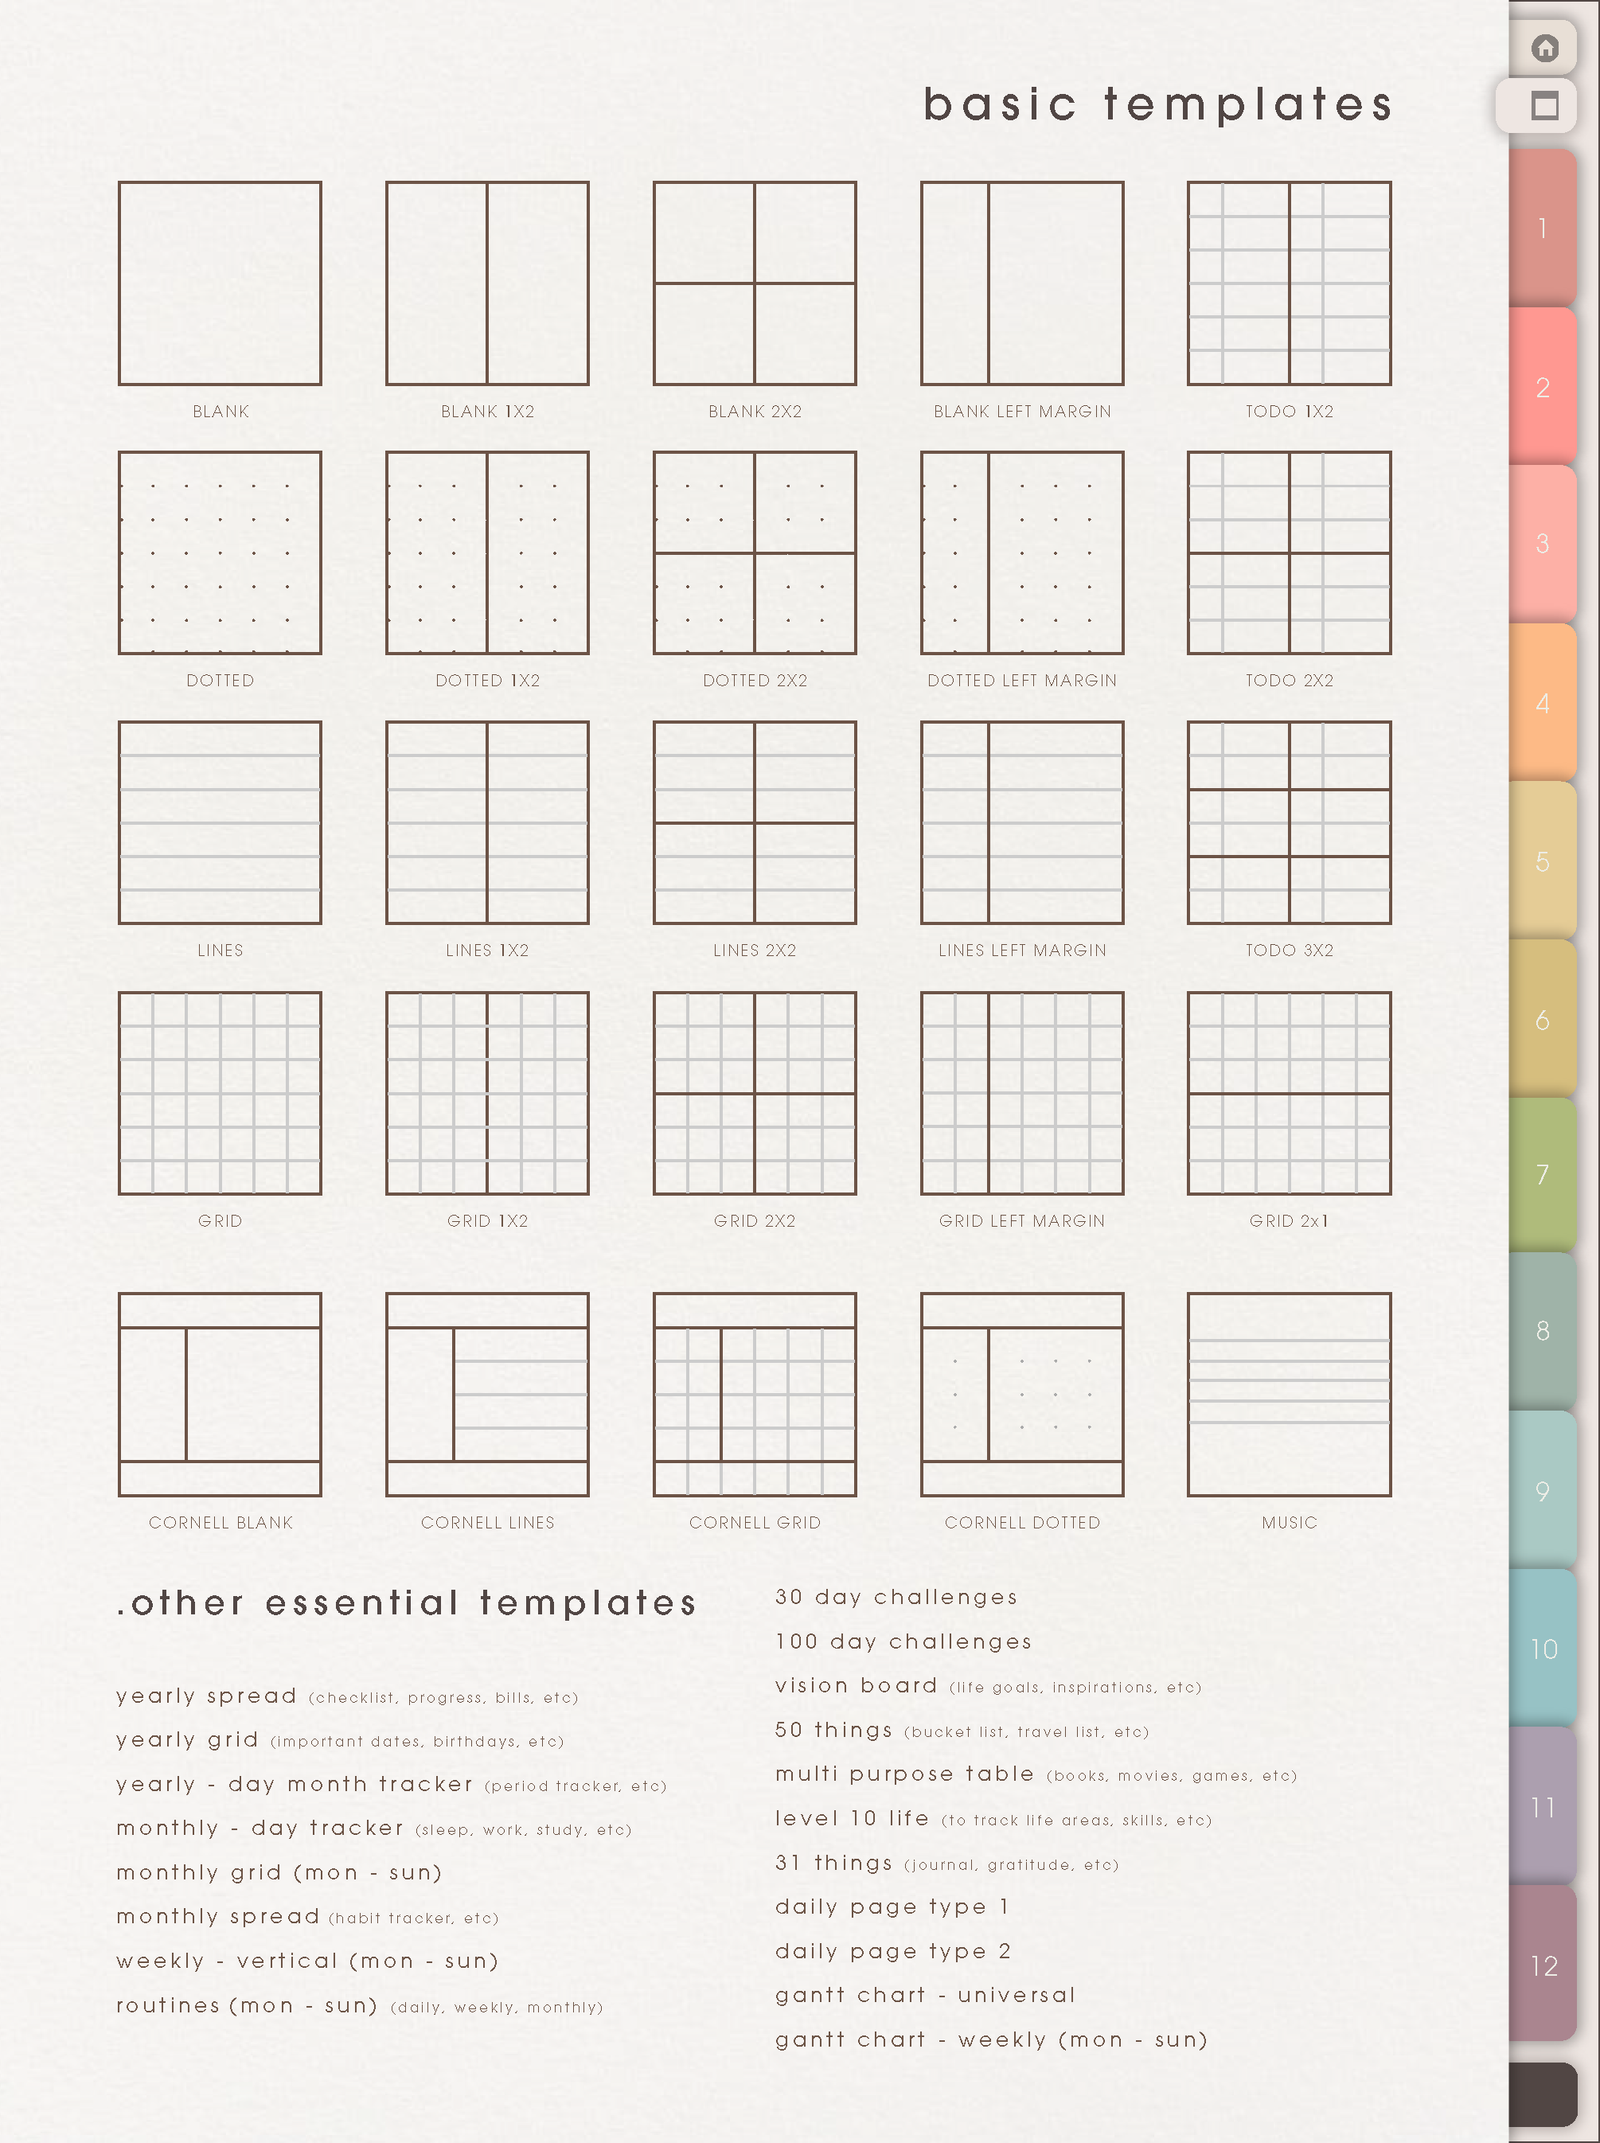
Use templates by purpose: lined pages for writing, grid pages for planning, blank pages for sketches, and structured pages for repeated lists, projects, or collections.
What Yume Noto V1 Portrait is best for
Yume Noto V1 Portrait is a simple indexed notebook for people who like a tall page that feels closer to paper. It is helpful for journaling, study notes, meeting notes, reading notes, recipes, lists, prayer or Bible study notes, personal planning, and any notes that feel better in one vertical flow.
It is not a dated planner. Use it for information, ideas, notes, and collections. If you need monthly, weekly, or daily dated pages, use a planner beside it and let Yume Noto hold the details behind those dates.
Version and setup links
- Difference between Yume Noto v1, v2, and v3
- What is a digital notebook?
- How to use NozomuNoto index pages
- How to use NozomuNoto template pages
- Which apps work with NozomuNoto planners?
- How to download and access your NozomuNoto files
How to use this notebook first
- Name only the sections you need now. Start with three to five sections so the notebook stays easy to use.
- Use Index as the map. Add short section names and return to Index when you need to find notes again.
- Use one Inbox section. Put messy notes there first when the note place is unclear.
- Use templates by job. Choose lined pages for writing, grid pages for planning, blank pages for sketches, and structured templates for repeated lists or projects.
- Archive old notes instead of deleting too soon. Move finished notes to an archive section when you might need them later.
Good ways to use this notebook
- School: subject notes, assignment notes, lecture summaries, reading notes, formulas, and revision pages.
- Work: meeting notes, client notes, project notes, process notes, content ideas, and follow-up lists.
- Home: recipes, routines, budget notes, cleaning lists, family information, and household projects.
- Creative: craft plans, product ideas, moodboards, sketches, quotes, and research pages.
- Personal: journal pages, memory notes, therapy notes, health notes, book notes, and prayer or Bible study notes.
Portrait is helpful for notebook-style writing, lists, study notes, journals, and tablet use that feels closer to paper.
Helpful expectations before you fill it
- Give the notebook one main job first. Decide whether it is mainly for school, work, home, projects, journaling, or mixed notes.
- Leave unused sections blank. Empty sections are normal. Use the notebook slowly and let the structure grow from real notes.
- Use Inbox before sorting. Catch messy notes first, then move the ones worth keeping after you can see what they are becoming.
- Keep dates in a planner or calendar. Use the notebook for the information behind those dates: notes, research, ideas, lists, and references.
Simple starter setup
For the first notebook setup, create sections such as Inbox, Work, Study, Home, Ideas, and Archive. Put messy notes in Inbox first, then move only the notes worth keeping into the right section later. This keeps the notebook useful without forcing you to organize everything immediately.
When the Yume Noto V1 Portrait setup gets tricky
1. You name too many sections
What happens: the Index looks organized, but writing becomes slow because every note needs a perfect home.
What to do: start with three to five section names, such as Inbox, Study, Work, Home, Ideas, and Archive. Add new sections only when a topic repeats.
2. A section becomes too full
What happens: one section has many notes and finding one page gets hard.
What to do: use the Notes Index for that section. Write short note titles and page numbers so the section becomes searchable by your own words.
3. The portrait page feels too narrow
What happens: tables, project dashboards, or side-by-side notes feel cramped.
What to do: use portrait pages for lists, writing, journaling, and vertical notes. For wide dashboards or big tables, a landscape notebook may be easier.
4. A copied template is hard to find
What happens: you copy a useful template, but later finding the filled page gets hard.
What to do: bookmark active copied templates, write them into Index or Notes Index, or keep one active-pages list near the front.
Where to go next
Yume Noto V1 Portrait explains the product pages. For page ideas, use Tips & Ideas. For app buttons, imports, page copying, bookmarks, covers, stickers, or device problems, use the Help Center guide for your app.
Still need help?
Send your order number, product name, device, app, and a screenshot or short screen recording if the issue is visual.